Sunday, December 30, 2007
CSLR Challege 109 Results
Wednesday, December 26, 2007
Shooting Shinny things is hard!
Created with Admarket's flickrSLiDR.
Had quite a learning experienced doing the 'Lexus Shoot' for a recent CSLR challenge. I wanted to take 'artsy' shots that accentuated the curves of the car and with the silver color of the car, make it look like jewelry. Every thing was single light source with very direct lighting and a lot of falloff.
The big problem with shooting something so shinny is that you can see everything in the refections - I had to use my backdrops to block out objects from in the garage - initially all the shots would have reflections of tool boxes, benches and everything else in the garage. Once I blocked those out all I had to do is stop getting me and the camera in the reflections.
Probably shot about 100 shots to get the ones here - Even though they all look black and white, there was no conversion it's just the way the car's tones come out - any toning seen was all done with shifting white balance.
The one thing I did learn from this shoot is how nice it would be to have a big open studio with no clutter for shots like this.
Latest CSLR Challenge
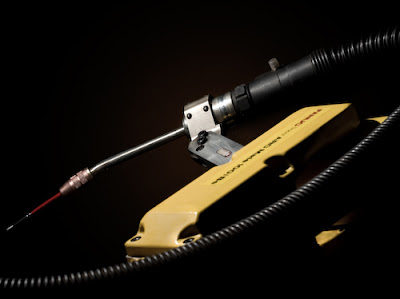
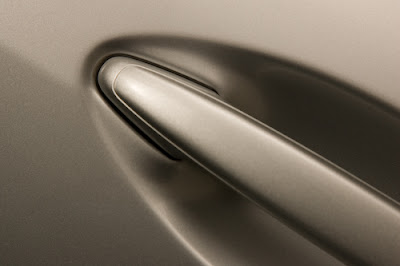
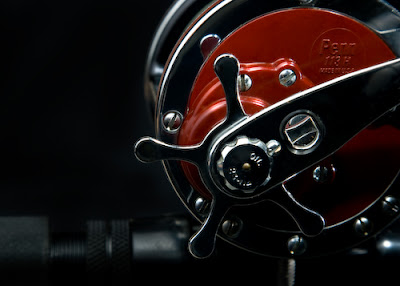
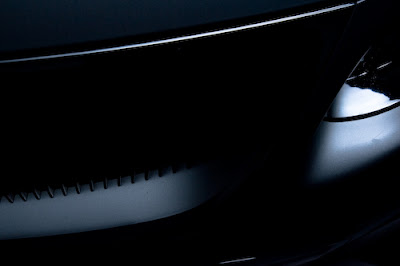
After winning the last challenge, I had to come up the the topic and host this challenge. I chose 'Mechanical Art as the topic' and it turned out to be quite a challenge for me. I ended up putting up the maximum number of entries allowed and I don't think I was quite taken by any of them, but with me being off work for the holidays it did give me the time to do 3 separate shoots for this topic which was fun. Although it seems I may be stuck in a rut with my lighting technique - seems all the different pictures have the same low key lighting. Will have to break out of that...
Sunday, December 23, 2007
TaW:#2 - Moonshot Split tone.
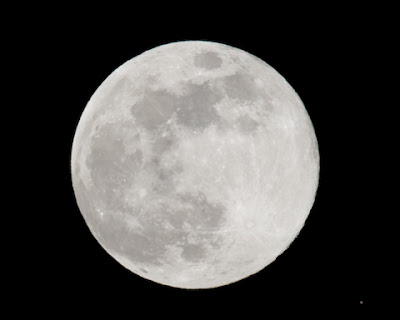 Canon 1dmkII 300mm2.8L w/1.4x (500s @ F8 ISO200)
Well after getting the image into the computer it was pretty boring. So a little magic in Lightroom playing with Clarity, tone curves and finally a bit of split toning thrown in at the end just for fun got me this.
It looks much better at full resolution. But tone curves is the magic tool to use for bringing out the texture in the moon's surface. Using the tone curve, I repositioned the shadow and highlight markers to the edges of the histogram, Then I set the shadow slider to -100 and the Highlight slider to +100 and adjusted the lights and darks to get as much texture out of the midtones as possible. This really let the sharpness tool get some extra detail when cranked up. Finally a little spilt toning to turn the shadows blue and there you go, quite a bit of difference from where we started. And no trips to CS3 - all Lightroom, I love it. :-)
Thursday, December 20, 2007
Ain't the Internet great.
Since I run a GoDaddy Domain, hosted through GoogleApps some of their tools don't play nice outside the network. I don't know why the same Google services work differently on their 'Apps' page but it does and I couldn't get our GTalk to work with Twitter but found this:
Cyborg Labs » Blog Archive » How to make Twitter work with your Google Apps hosted domain on GoDaddy
Thursday, December 13, 2007
'Skaterboy' takes first place!
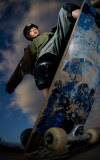 I guess the "4th time's the charm" as my 'skaterboy' won 1st place in the Canon SLR challenge on Pbase. There's no cash or prizes but it sure is great to have an image recognized by your fellow Canon shooters as being the best. Of course, it could have been more due to my model than my photographic skills! I better use Aly and Matthew for the next couple sessions before it goes to his head! You can see the larger version of the wining image here.
Wednesday, December 12, 2007
Oh oh...
Tuesday, December 11, 2007
Strobist: Strobist Photos of the Year: Rules and Regs
Thursday, December 6, 2007
Technique a week (TaW): #1 Soft Focus.
- duplicate your main image layer
- apply a Gaussian blur
- the use either a 'lighten' or 'darken' blend mode to the layer
- This will typically be way to harsh an effect so adjust opacity to taste.
 Origninal Image (Click to Enlarge)
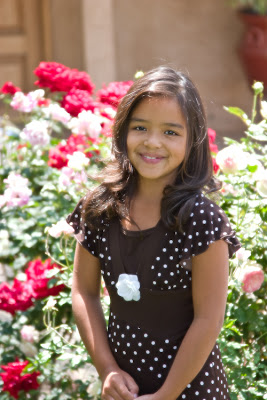 After (Click to Enlarge)
Technique a week.
So to put an end to all that forgetting and to hopefully ingrain anything I've learned into my thick skull, I've decided to do 'a technique a week' where I take technique I've learned - no matter how small and apply it to one of my images and post them here. Just like the CSLR challenge, this will force me to apply new concepts and to my photography and hopefully as I continue to practice these techniques, they'll become part of my workflow and hopefully become the inspiration for the creation of new techniques all my own and maybe even one day help to develop a signature style of my own.
Watch for the posts I hope I can keep it up for at least a year....
Sunday, December 2, 2007
I'm flattered...
So my last minute shot in the 'Vodka Shoot' done for the CSLR "Backlight" Challenge was actually the one that everybody liked. It placed 6th overall and the actual Vodka shot didn't place!
To top things off, "The Strobist", David Hobby, the creator of the 'less gear - more brains - better light' blog, added my pic as one of his favorites!
Since I've probably learned more off his blog in a month than I've learned in years on my own, I'm really flattered one of my pics caught his eye... cool.
CSLR challenge entry #4
Keeping up with the CSLR challenge thing and doing my best to try something new with each entry. Here Ryan was patient enough to let me work the lighting. We had to work fast to take advantage of the cloudy sky ( a real rarity in Arizona)
The topic was 'Wide and Low' so I set Ryan up on a pony wall and used a clamping ballhead to support the camera at 'wheel level' - pretty sweet little clamp - its a Sinar View Camera mount so it had no problem keeping my MkII solidly supported.
Worked this one with two off camera strobes set to manual. The 'Master' strobe was triggered via sync cord and the second was using the Canon wireless slave mode. Don't know why I didn't use my ST-E2 I guess I'm not that confident in its operation outdoors.
I did do some Post Processing to get the Hyperfocal length, f16 wasn't enough so I focus bracketed and blended the images to get everything sharp.
Saturday, December 1, 2007
Vodka Shoot Setup

Heres a the setup I used for the 'Vodka Shoot'. My Table was a sheet of glass on 2 sawhorses, a sheet of 4x8 pegboard was clamped to 2 light stands. (I was originally going to use the canvas you see on the floor to do the shoot be I saw the pegboard laying against the wall and thought I'd give it a try - the effect was really a pleasant surprise.
3 Strobes were used in the setup the main light was the 55oex behind the peg board set at full power. On the stand behind the camera was a 580exII set at about 1/16 power through a long snoot and a green gel. Finally the last 580exII was set at 1/32 power and hand held during each shot - the snoot let me just spotlight just the details on the front of the bottle without upsetting the backlit pattern being created by the peg board.
Notice the 'Strobist' light modifiers - Snoots were all made from sheets of black hobby foam and velcro and thats not a cooler under the sawhorse - that's my Softbox!
It was a fun learning and experimenting on this shoot - looking forward to the next challenge (My 'Reflections' shot took 6th place - 'Colors of my Holiday' (shot below) did not place)


